Unboxing and Assembly
By Dan Jenkins on 5 November 2026
BeginnerYour Dottie Board comes in one of two versions: legs or framed. Follow the section that matches yours, then move on to Getting Started to connect it to WiFi.
Legs version
- Take the legs out of the packet along with the USB-C cable and the USB-C power adapter, then set them aside.
- Carefully remove the Dottie Board from the wrapped portion of the box. The board is delicate, so handle it with care.
- Place the board and its cardboard protective cover on a flat surface.
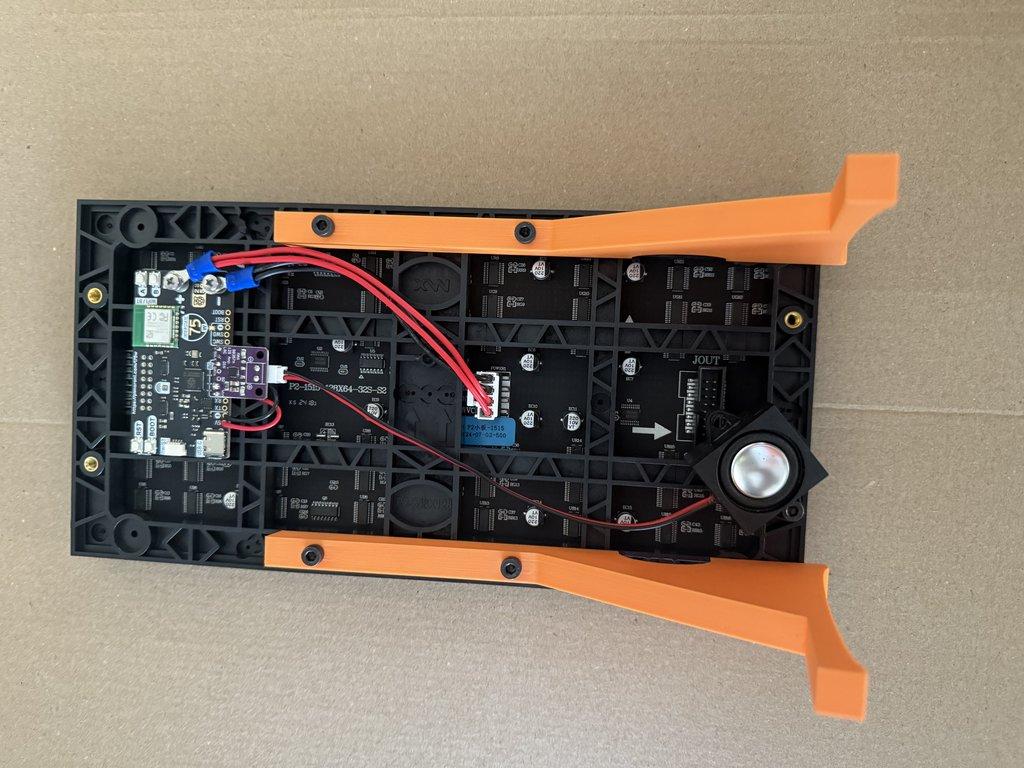
- Screw the legs into the board using your fingers. If they do not tighten easily, use an Allen key to secure them.
Note: It is important to attach the legs correctly. Refer to the image below for the correct orientation.
Powering on
- Plug the USB-C cable into the board as shown in the image above.
- Remove the cardboard protective cover by peeling off the sticky strips.
- Once it is free, pick up the display and stand it on its legs.
Warning: The screen is delicate. Do not press on it or put pressure on it when handling.
Framed version
- Remove the board from the packaging.
- The USB-C cable is already attached. Take the USB-C power adapter from the padded envelope and plug it into a power source.
Next: Getting Started.
Was this article helpful?
No comments yet. Login to start a new discussion Start a new discussion