Getting Started
By Dan Jenkins on 23 February 2025
BeginnerSetting Up Your Dottie Board
Leg Version
If you have the leg version of the Dottie Board, follow these steps to set it up. If you have the framed version, scroll down for further instructions.
Unboxing and Assembly
- Take the legs out of the packet along with the USB-C cable and the USB-C power adapter, then set them aside.
- Carefully remove the Dottie Board from the wrapped portion of the box, ensuring you handle it with care as the board is delicate.
- Place the board and its cardboard protective cover on a flat surface.
- Screw the legs into the board using your fingers. If they do not tighten easily, use an Allen key to secure them.
Note: It is important to attach the legs correctly. Refer to the provided image for the correct orientation.
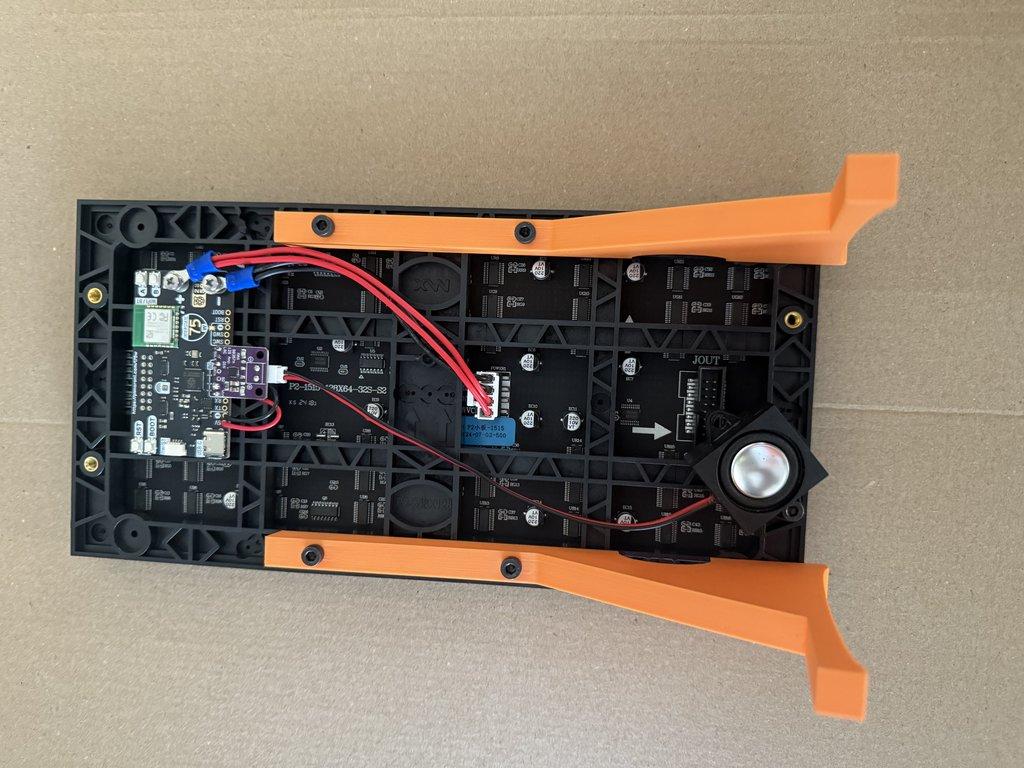
Powering On
- Plug the USB-C cable into the board as shown in the provided image.
- Remove the cardboard protective cover by peeling off the sticky strips.
- Once free, pick up the display and stand it on its legs.
Connecting to WiFi
To use your Dottie Board, you need to connect it to WiFi:
- Create an account at Dottie Boards and follow the setup instructions.
- You'll have three connection options:
- USB Connection: Recommended if you have a computer with a USB-C port.
- Bluetooth Connection: Available as an alternative for devices without USB-C.
- WiFi Network
Setting Up WiFi Credentials
Once you've chosen your connection method, follow these steps:
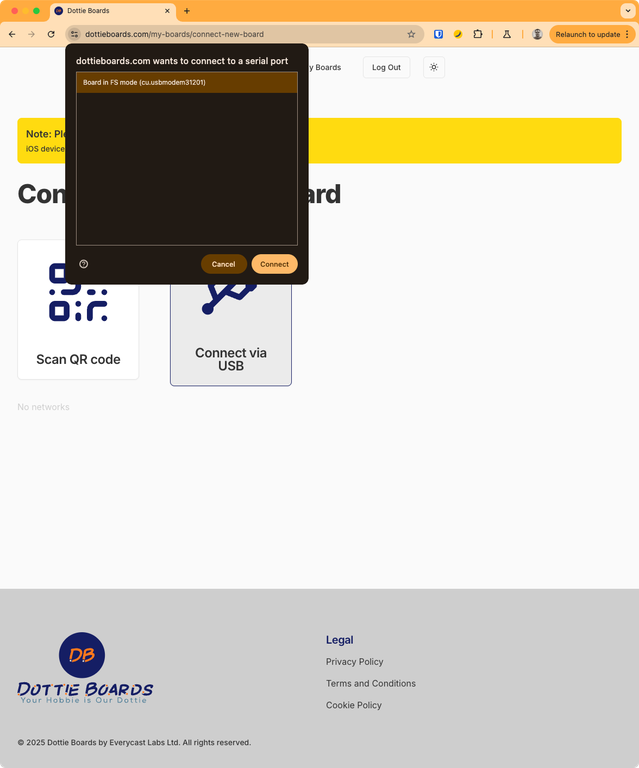
- USB Setup: A browser popup will appear listing the display as "Board in FS mode."
- Bluetooth Setup: A popup will appear saying "DB" followed by your board’s serial number.
- WIFI Network: Your Dottie Board will emit its own WiFi network
After Setting up the wifi credentials you need to restart your Dottie Board by power cycling it.
USB and Bluetooth Setup don't work on iOS and iPadOS, you need to use the WIFI Network option.
USB Setup
Bluetooth Setup
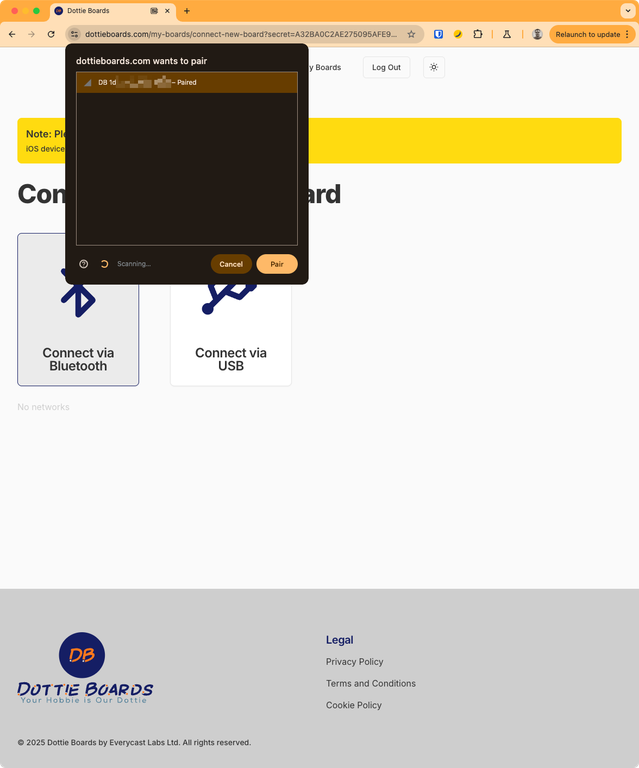
After connecting via either the USB or Bluetooth methods, a form will be displayed listing all available WiFi networks in the area. Select your network and enter your password.
Important: Your WiFi password is never sent to our servers—it goes directly to the board.
WiFi Network Setup Method
- Your Dottie Board will emit its own WiFi network; it’ll be named “DB-” followed by the first part of your board’s unique ID (“DottieBoard-” on the legacy RNLI board).
- Connect to that network using your phone, tablet or computer. The default password is
dottie123. - Once joined, open your browser and go to http://192.168.4.1.
- You’ll see a webpage that lets you enter your WiFi network credentials.
- Submit them, and the board will restart. You still need to power cycle the device fully once this has restarted.
- Once the Dottie Board has restarted fully it should offer you a code on the screen. Enter that into the website where it says "Connect with a code"
Framed Version
Setting up the framed version is even easier:
- Remove the board from the packaging.
- The USB-C cable is already attached, so simply take the USB-C power adapter from the padded envelope and plug it into a power source.
- Follow the same WiFi setup instructions as the leg version by creating an account at Dottie Boards and following the instructions there.
Your Dottie Board is now ready to use!
More help
Was this article helpful?
No comments yet. Login to start a new discussion Start a new discussion